On-Host Installation
In on-host monitoring, the agent runs on the server it will monitor and uses packet sniffing to capture query data. Use this installation method if:
- You are monitoring a MySQL or PostgreSQL database you manage (whether on your own hardware or on EC2)
- You are monitoring MongoDB or Redis
If you have multiple database servers running on one server and only wish to monitor some of them, please see the Advanced Installation instructions where you will find details how to specify which database to monitor.
This currently supports unencrypted TCP traffic only; if you are using an encrypted connection (or any connection other than TCP), you will need to use the off-host installation method.
Installing DPM
On the Inventory page, begin by opening the wizard, either by clicking “Setup your first host” (if this is the first time you are adding a host), or “Add New Host” if it is not.
Once the wizard has opened, select “On-Host.”
Install Agents
After selecting “On-Host”, Use the tab below “Install the Agents On Your Server” to select the operating system of the server, and follow the instructions shown to install the agent.
Linux or FreeBSD
Run the commands to download and install the agent, which will then detect the databases that can be monitored.
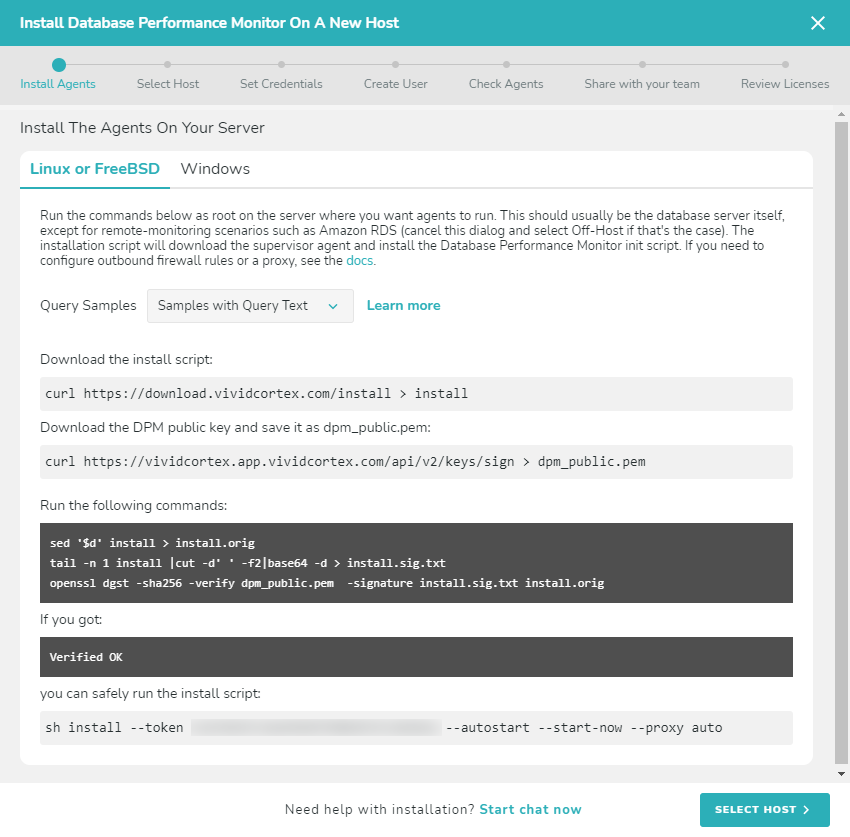
Note: To install the agent to run with a non-root user’s permissions, add the –user parameter when running the install script. You still need to run the install script as root. Example:
sudo sh install --token [your token] --autostart --start-now --proxy auto --user [username]
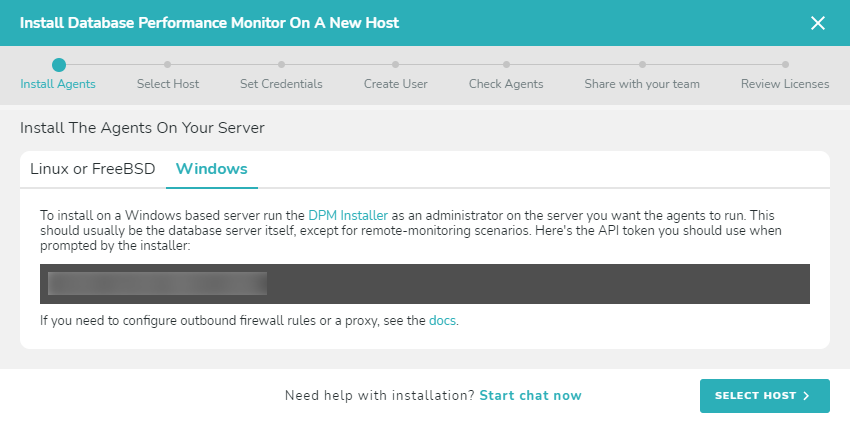
Windows
Follow the onscreen instructions to download and install the agent using the SolarWinds DPM installer. The installer must be run as an Administrator.
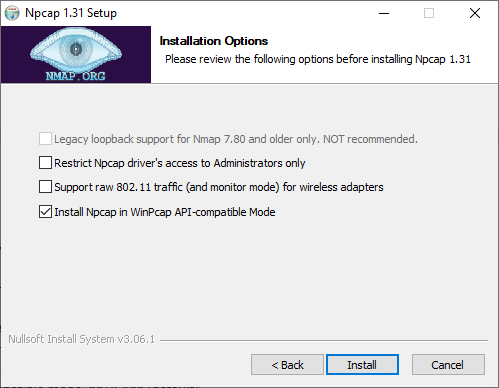
Important: If you don’t have a packet capture driver in place, the SolarWinds DPM Windows agent installer will ask you to install one if you intend to do on-host monitoring. We recommend downloading and installing Npcap. Make sure to use following configuration:
- Automatically start the Npcap driver at boot time TICK
- Support loopback traffic (“Npcap Loopback Adapter” wll be created) TICK
- Use DLT_NULL as the loopback interface link layer protocol instead of DLT_EN10MB TICK (default)
- Restrict Npcap driver’s access to Administrators only TICK
- Support raw 802.11 traffic (and monitor mode) for wireless adaptors UNTICK
- Support 802.1Q VLAN tag when capturing and sending data TICK (default)
- Install Npcap in WinPcap API-compatible mode TICK (default)
Follow the onscreen instructions to complete the agent installation. Wait a few moments and then Select Host in the SolarWinds DPM app. You should see the new OS host appear as the supervisor registers it.
Select Host
Select the database you wish to monitor from the list which appears below and click “Set Credentials.”
Set Credentials
On the Set Credentials screen, enter the address and login information for the service you wish to monitor. This page will look slightly different depending on the kind of service (MySQL, PostgreSQL, etc.).
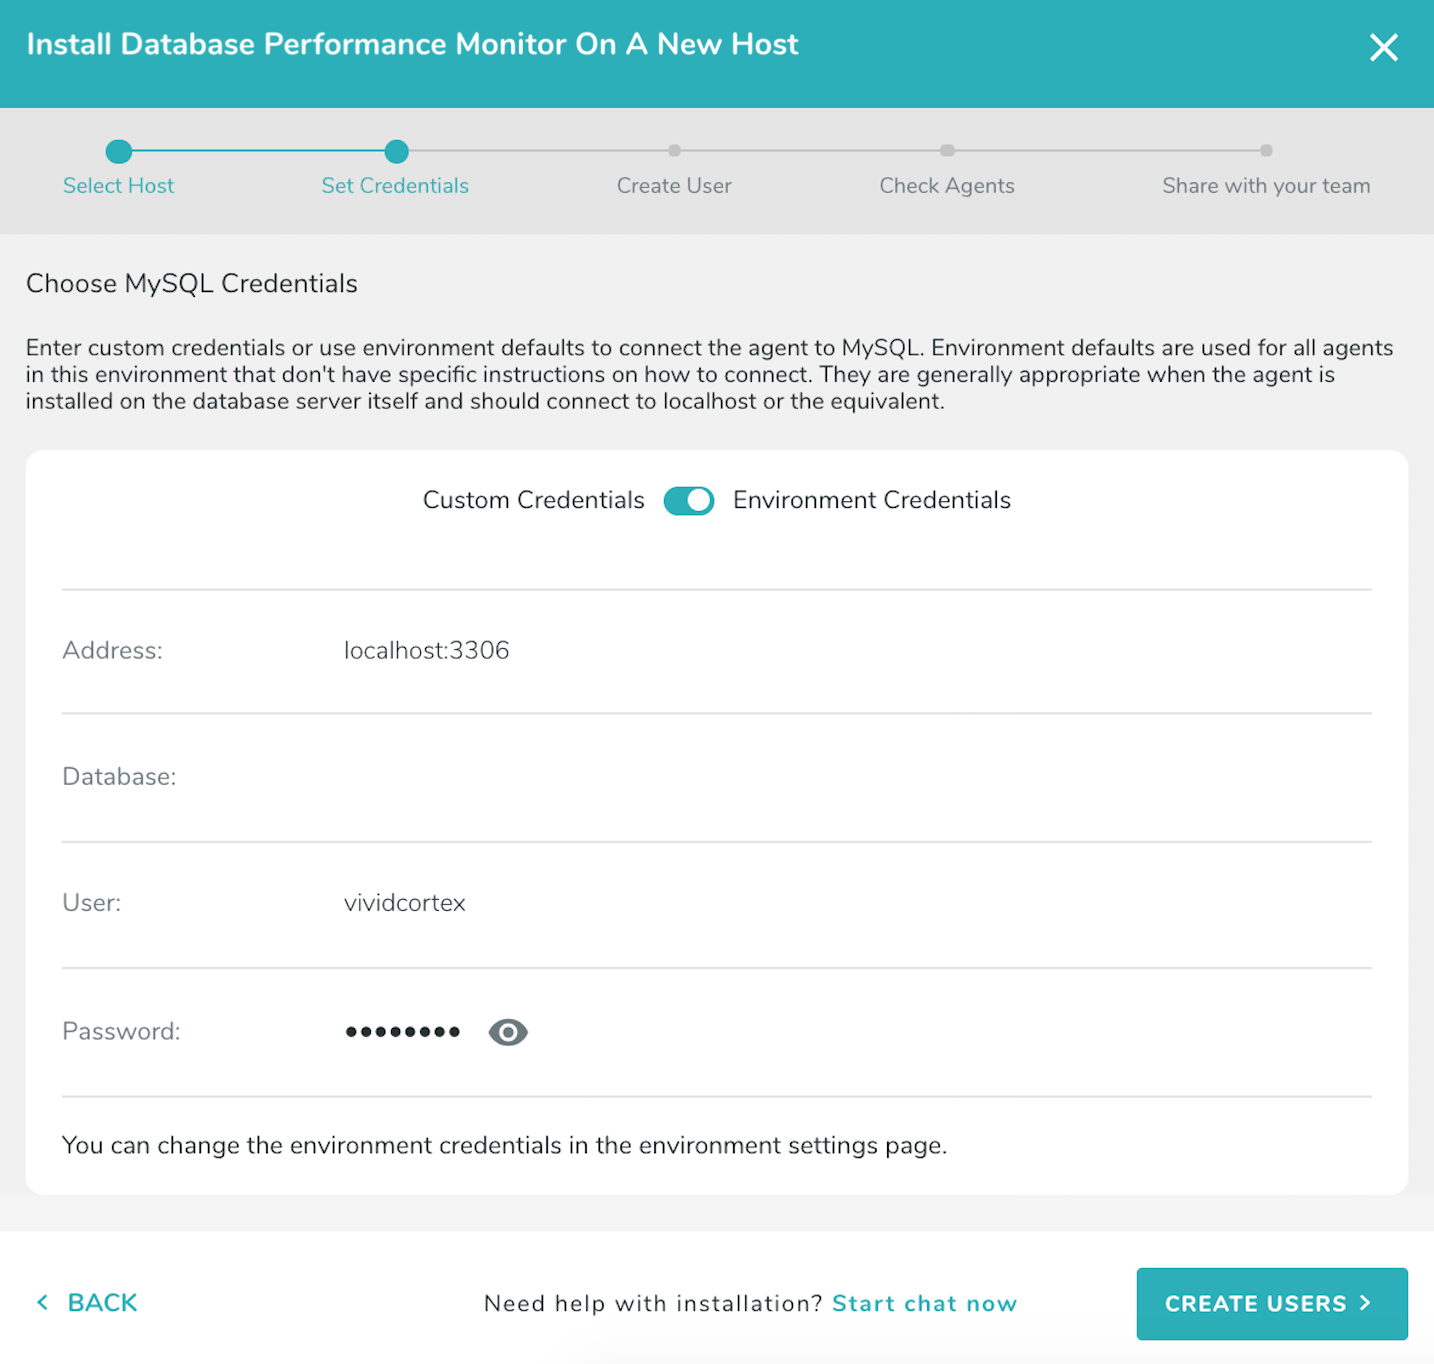
This will be the login that DPM uses to connect. You can use either the environment’s default credentials, or set custom credentials if necessary. For more information about setting and configuring credentials, see here. Then select “Create User.”
Create User
For MySQL, PostgreSQL, and MongoDB, if you have not already created a user with the correct permissions for allowing DPM to monitor the database, you can do that now. For more information on the privileges required for monitoring and the purpose each privilege serves, refer to our Privileges documentation.
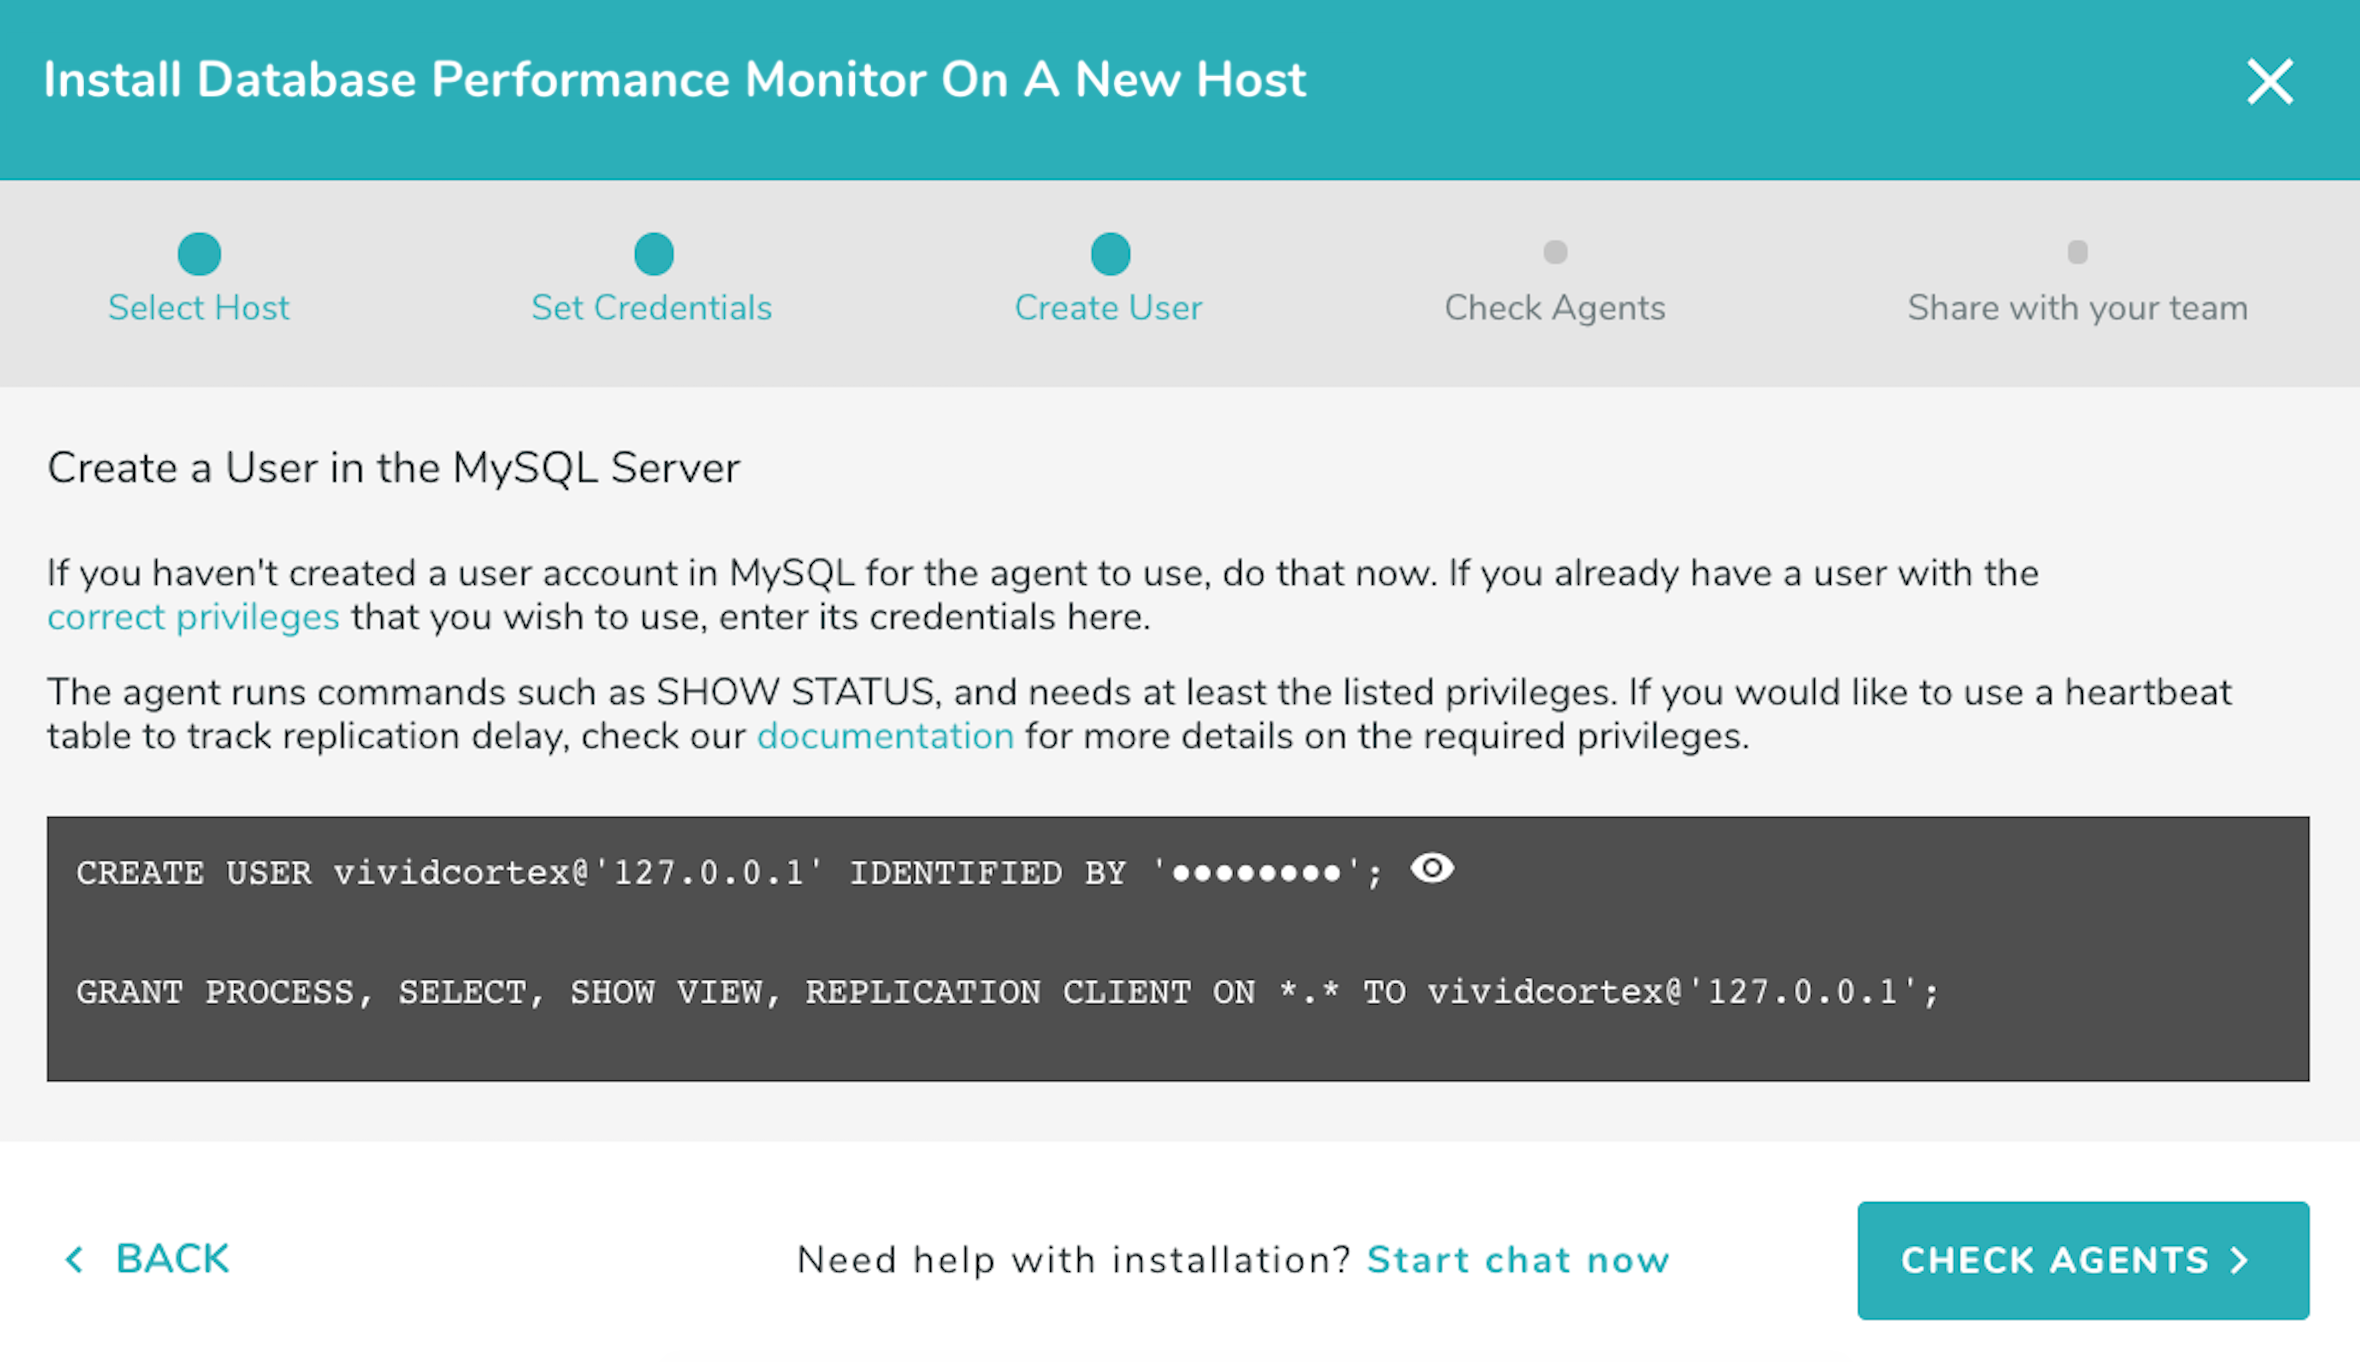
Then select “Check Agents.”
Check Agents, Share with your team, Review Licenses
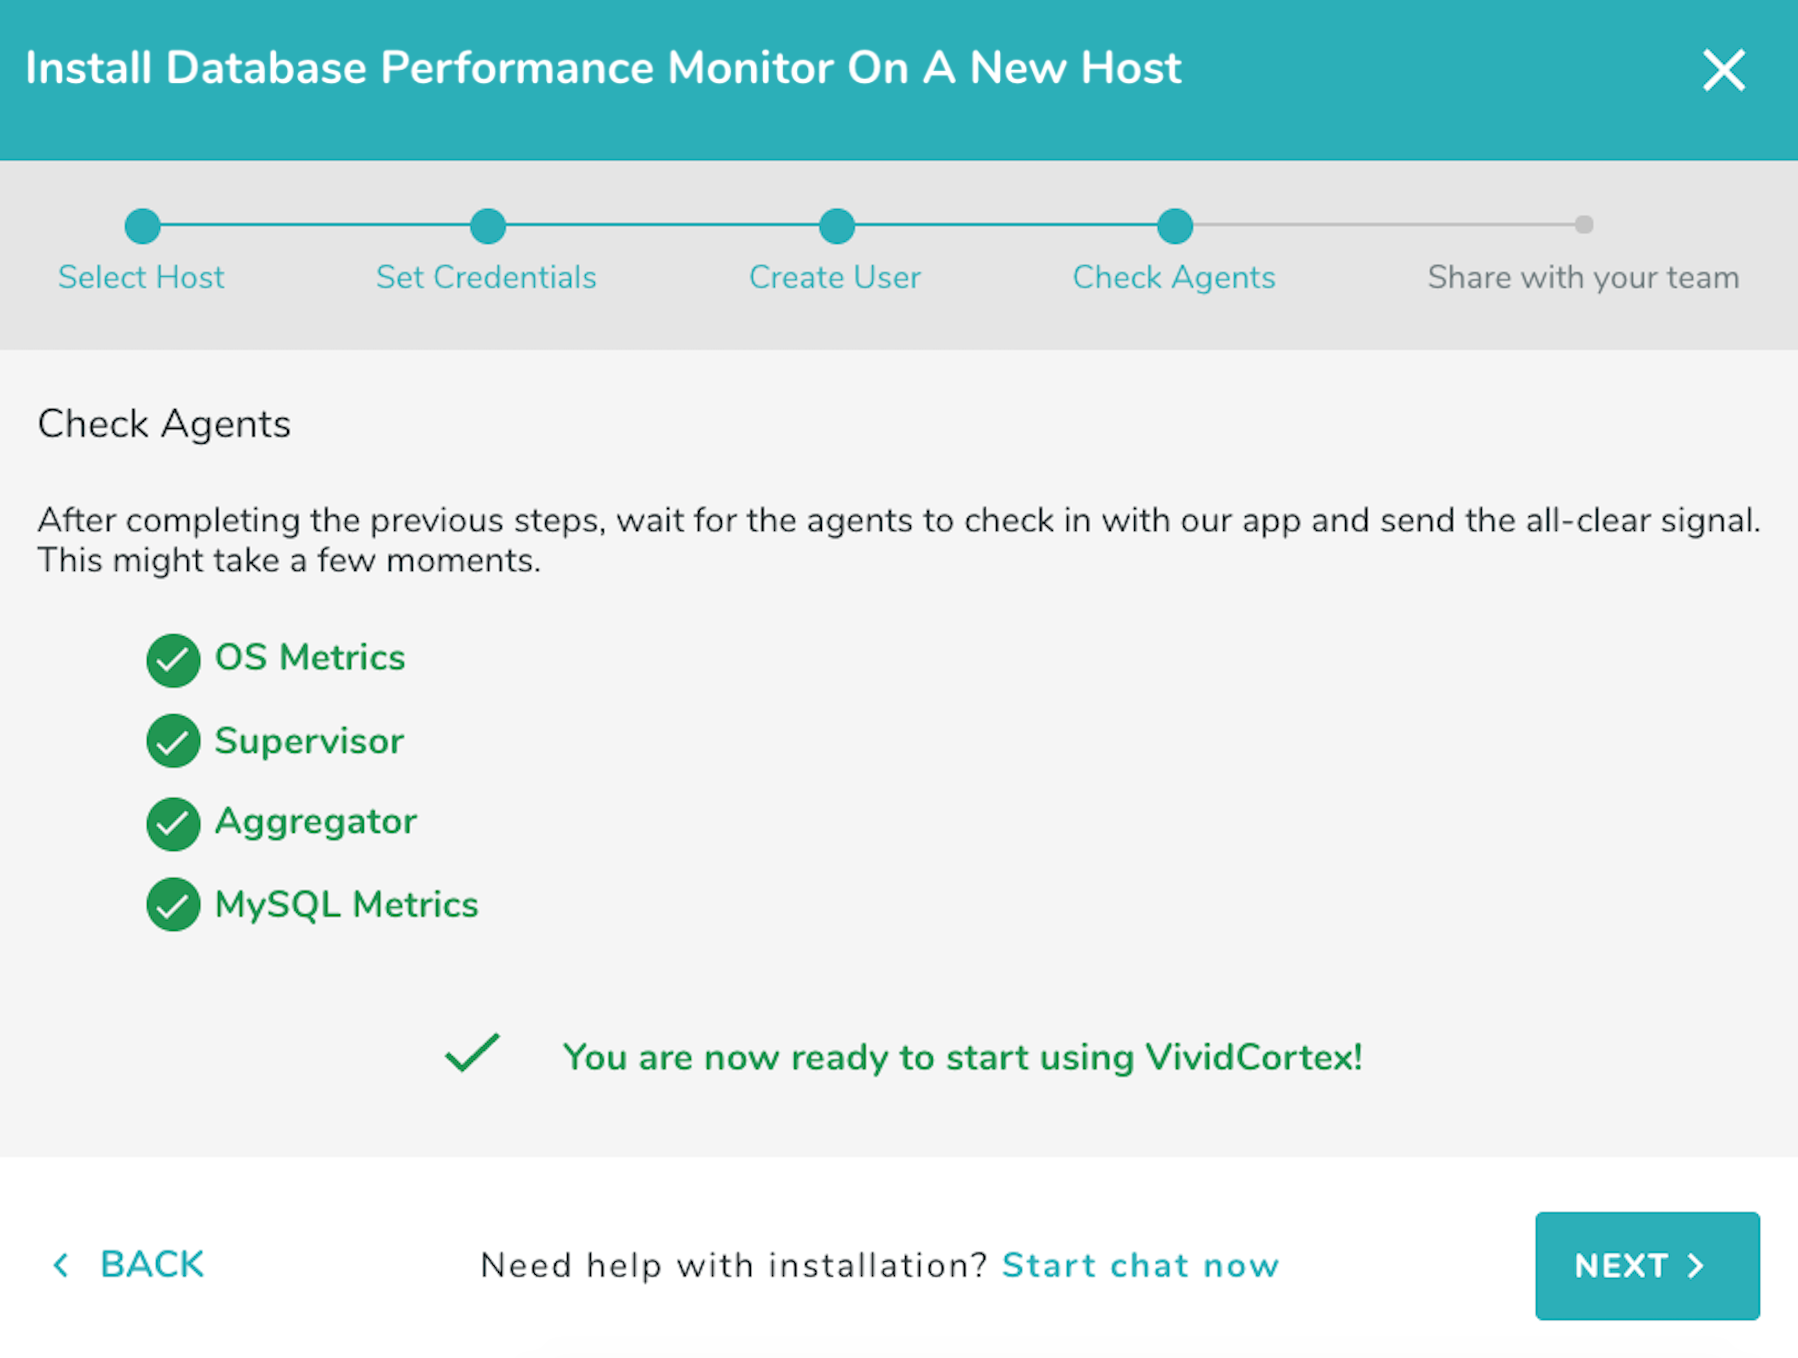
After ensuring that the plugins have correctly checked-in, you can proceed to the last step and create additional users within your organization so that they will have access to DPM and review your licenses. If any of the agents do not successfully start, close the install dialog and check the agent’s log for more information.