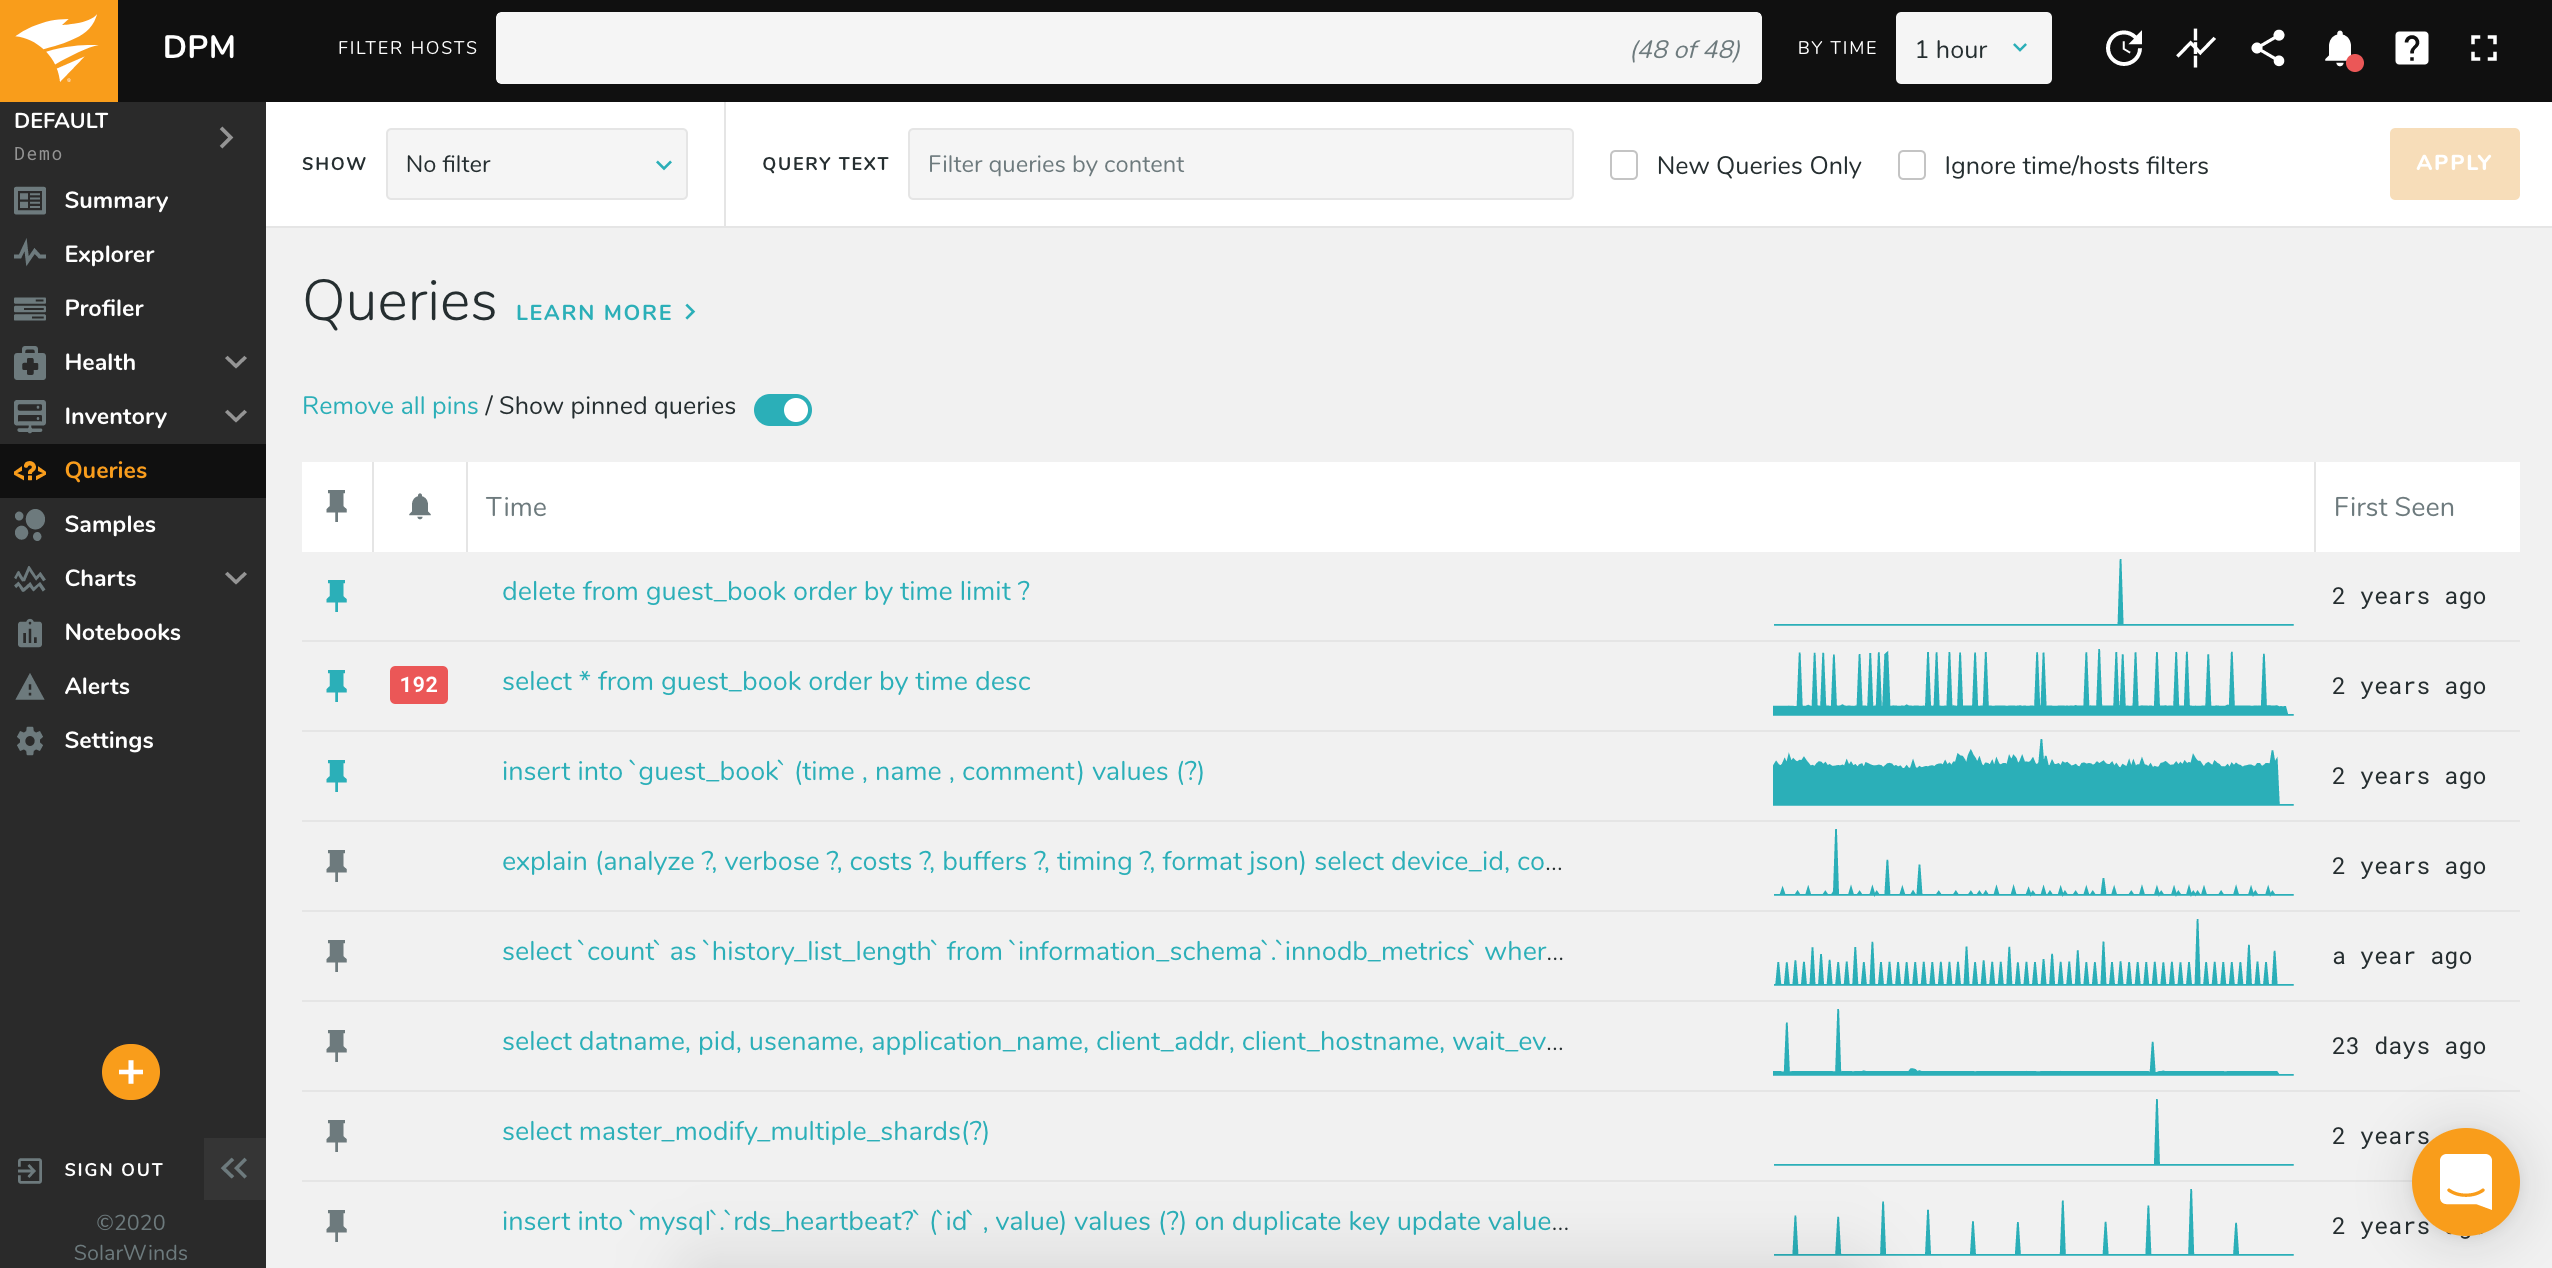
Queries Page
The Queries page shows a list of queries, and allows you to filter by query text, host, and timeframe when the query was first seen / last active.
Note: The default behavior is to show queries that were last active within the approximate timeframe shown in the time selector.
Filters
The top navigation bar has filters and options for changing what is displayed in the Queries table.
- You can filter queries by category, such as queries with errors, warnings, missing indexes, poor indexes, or slow response times.
- You can filter queries by when they were first seen. For this, we match against the time selector in the upper right corner of the application.
- You can request queries that will ignore the host and time selectors. This selection is valuable if you want to find a specific query using the text search without host and time constraints.
- You can filter on specific query text.
When you filter by errors, you are given the option to specify a specific error code. Note that this option is not available for instances using our Off-Host install configuration.

The Main Table
The main area of the UI shows a high level overview of each query returned from our APIs.
- Notifications (the bell icon) is the number of errors and/or warnings detected for this query family. See the Viewing Query Notifications section below for more information.
- Time shows the query family text, as well as the sum of response times for the query over the selected time span (sparkline).
- First Seen shows the time the query family was first seen by the application.
Pinning
Pinning allows you to save a small collection of queries, and show that collection at the top of the table. To pin a query, click the ‘pin’ icon to the left of the query. This will move the query to the top of the table, and will remain at the top even when paging or refreshing the page.

You can hide pinned queries by using the switch in the top left corner above the table.
To unpin a query, click the colored icon to the left of the query. Or, you may remove every pinned query by clicking “Remove all pins” in the upper-left corner above the table.
Selecting Queries
Clicking a query in the table takes you to that query’s details page, which shows more information about that query family; including samples, key performance indicators, notifications, and host information.
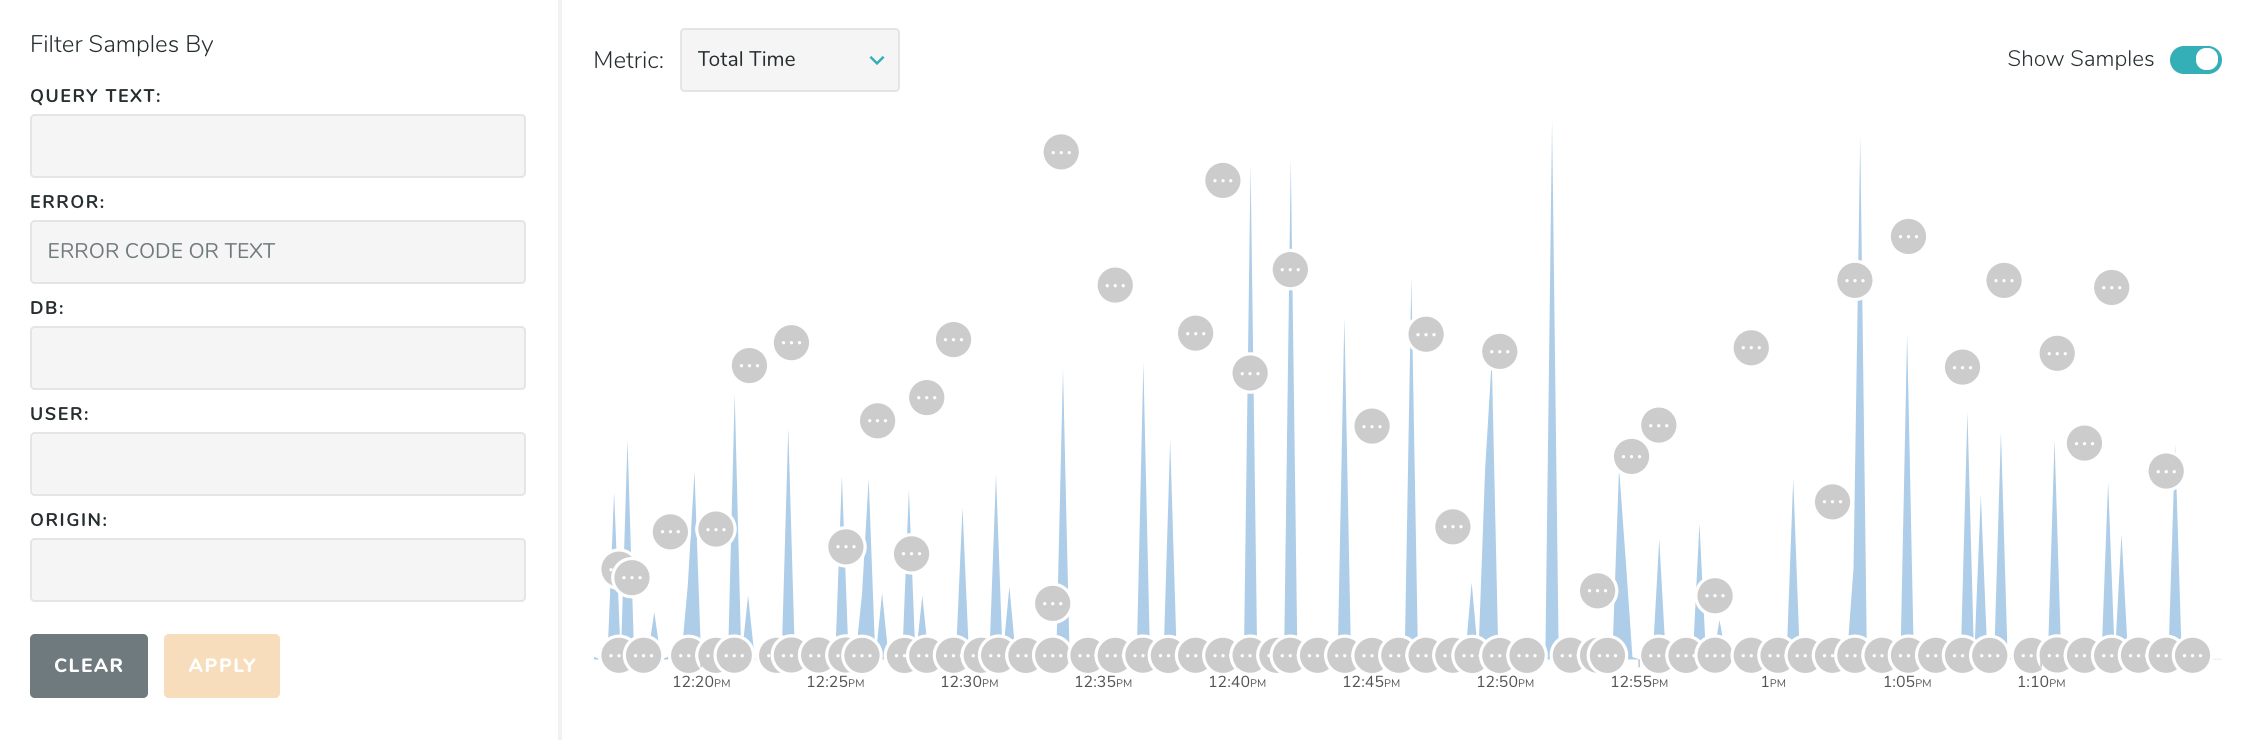
The main chart shows a combination of time-based information, such as total time, throughput, or average latency, as well as specific query samples (if any exist). You can change the sparkline within the main graph through the drop-down menu above the graph. You can also filter specific samples by query text using the text input next to the drop-down.
Below the main chart is the performance widget. This shows similar information for time, throughput, and average latency as the main graph. However, while the main graph is broken out by action, the performance graph sums all actions into the sparkline.
Viewing Query Samples
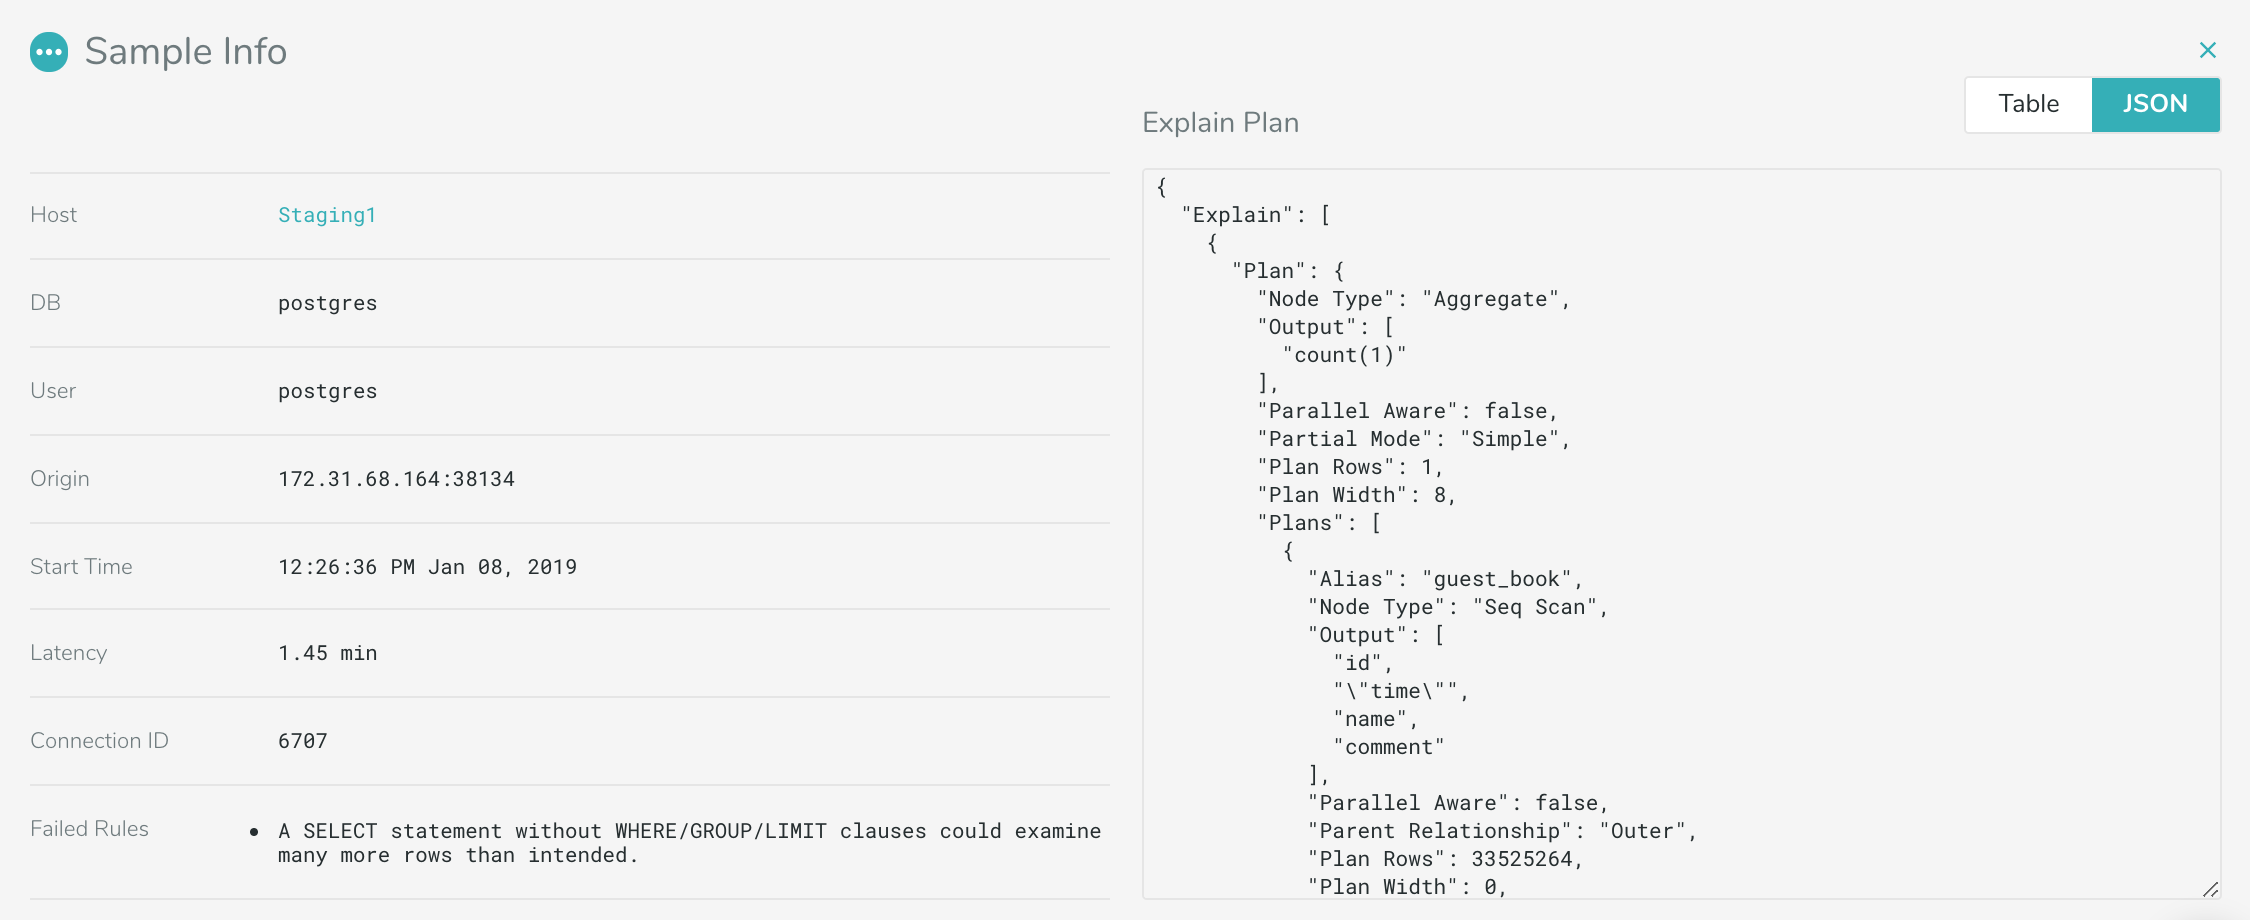
For each query that executes, DPM records the query in digested form (the “query shape” for MongoDB), which removes literals and numeric portions of database and table names and replaces them with question-marks. In addition, DPM takes individual samples of raw queries probabilistically, leaving the literals in place and providing additional useful information about those queries, such as EXPLAIN plans, information about the connection/user/database, and query latency. The main chart shows a number of these samples within the selected time range. To obtain more information about a specific sample, click the dot representing the sample within the main graph. When selected, detailed information about the sample will appear below the graph. This includes the sample’s exact query text with additional information as available, such as the execution plan (EXPLAIN plan).
Dots of a specific color within the main graph quickly detail high level information about the sample.
- Clear: The sample did not have warnings or errors.
- Yellow: The sample contained at least 1 warning.
- Red: The sample contained at least 1 error.
EXPLAIN plans are denoted by a ‘…’ in the center of the dot. Therefore, a main graph may visualize a sample that has an error (red) as well as an EXPLAIN plan.
For MySQL and PostgreSQL, raw query samples are examined to determine whether it fails one of a number of rules, each designed to identify and warn on a number of possible query-writing and query-optimization problems. Any failed rules are listed under the Connection ID as in the above screenshot. For more information on the rules which we apply, see here.
For more information about options for limiting our access to raw query text, see here.
Comments and Notes
Users of your DPM instance can leave comments and notes on any query’s detail page. No special permissions are needed.
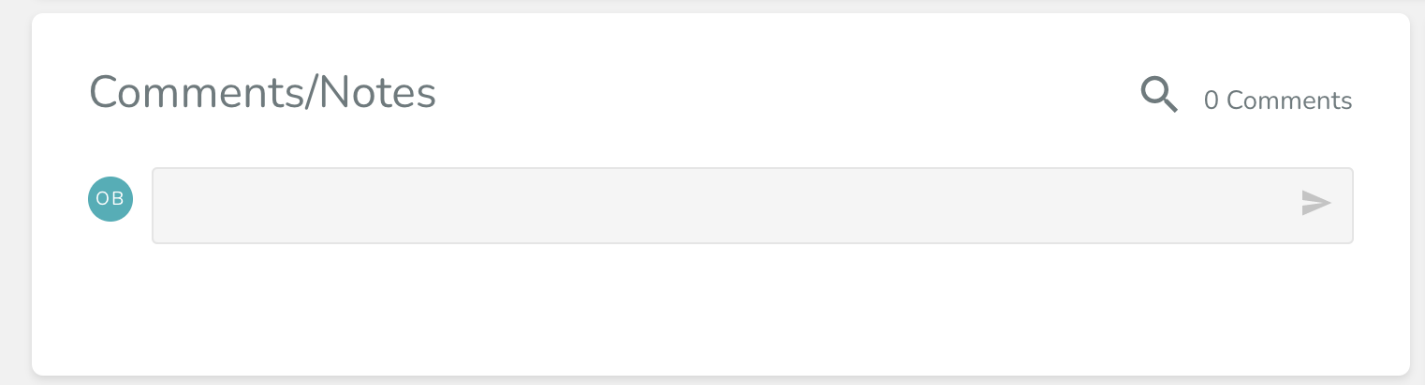
Type your comment into the Comments/Notes box and press the send button.

Use the search feature to filter comments by the given text.
Click the ellipsis button to show options for editing and deleting comments. Unless they are deleted, comments and notes are available as long as the query exists.
Visual Explain Plans
For SQL Server databases that you are monitoring, Explain plans can be rendered graphically in DPM, and you can see the Visual Explain Plan for any SQL Server query with samples. To view, click on a dot indicating a query sample to view the sample. Scroll down to see the Explain plan and click “Visual View.” This will open the plan in a new tab in your browser. You can use the mouse to navigate around the plan; click on a node to show more information pertaining to that node, or click an arrow to highlight only the nodes in that path segment. If the explain plan is large, you can zoom in or out of the visualization by using the + or – buttons.

Viewing Query Notifications
Because DPM captures the network traffic to the database server, we are able to observe queries that return errors or warnings to client applications. These could be anything from permission errors to lock wait timeouts or syntax errors. Each type of error or warning will result in a notification both in the main Queries table and in the query’s details page:
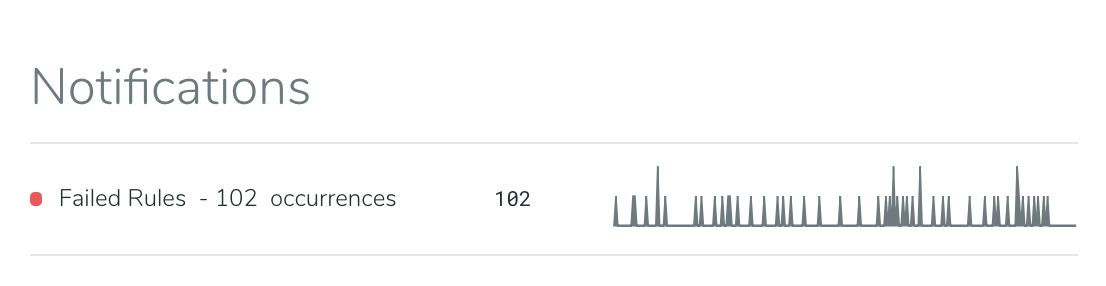
Each notification shows details about that specific error or warning, such as the error number, text, and the percentage of executions that resulted in this error. Query notifications also include any failed query analysis rules.
MySQL Warnings
When you issue a query against MySQL, the server’s response indicates how many warnings were generated inside the server. Warnings can be quite serious, depending on your server’s configuration: truncated data, skipped rows, invalid data conversions, and many more, so it is very important to find them when they happen in production.
DPM displays warnings as notifications, similar to notifications generated from query
errors. However, unlike errors that are sent across the network
with an error code and description, warnings are a little more difficult to inspect. MySQL only
sends the number of warnings generated, not the text of the warnings. The warnings themselves
can only be viewed with the SHOW WARNINGS statement, and only on the connection that generated
the warnings. No one else can inspect them.
DPM is able to capture and display warnings for raw query samples we are able to EXPLAIN, by
executing SHOW WARNINGS immediately after the EXPLAIN. This only applies to SELECT statements as
MySQL does not return information for other explainable statements.
To find out what warnings were issued for queries we do not or cannot EXPLAIN, follow a process similar to the below:
Note: Do not execute any of the following steps unless you understand them and are sure it is safe. No procedure is guaranteed to be safe in all circumstances, so treat these steps as a guide, not a foolproof process.
- Select a sample that has one or more warnings.
- Copy the exact SQL of the sample.
- Connect to the database and begin a transaction.
- Execute the query, and then execute
SHOW WARNINGS. Take note of the warnings. - Execute a
ROLLBACKto cancel the transaction. Close your connection to the server.
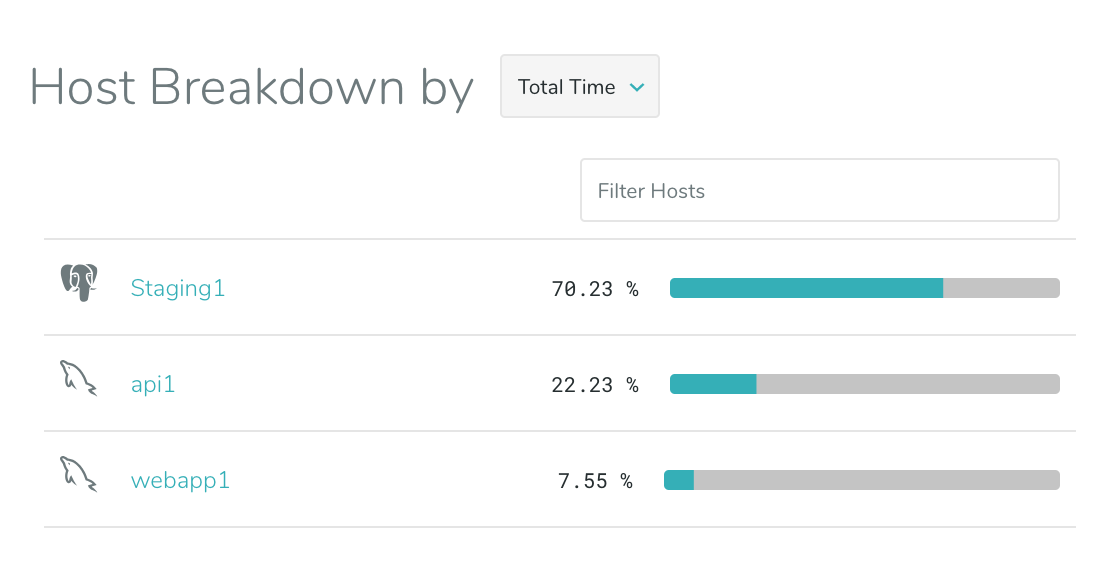
Host Breakdown
The Query Details page also shows the hosts the query has been associated with during the time selected, along with the portion of the total time each host contributed toward what was seen. You can also see the breakdown of queries across hosts by count.